step-by-step · updated apr 2026
Drughub getting started
Eight steps from a fresh machine to your first Drughub visit. Nothing skipped, nothing assumed. This manual covers the complete path: choosing your operating environment, installing Tor Browser, generating a PGP key, setting up a Monero wallet, verifying the real drughub market link, registering, and placing a first order safely.
Most mistakes happen in the first hour. Rushing through Tor setup, reusing an existing PGP key, paying from an exchange wallet, or copying a drughub market link from a clearnet search result. This manual exists to stop those specific mistakes — not to cover every edge case. Read it once before you start.
Est. first-run time: 75–90 minutes · Setup is one-time · Subsequent visits take under five minutes
Tails OS from USB — strongest isolation
Tails OS is a live operating system you boot from a USB stick. It routes all network traffic through Tor by default, leaves zero traces on the host machine, and resets to a clean state on every shutdown. No session data, no browser history, no downloaded files survive a reboot unless you explicitly save them to an encrypted persistent volume.
This is the correct choice for any use case where a compromised host machine would be catastrophic. Tails requires an 8GB USB stick and roughly forty-five minutes to set up the first time. After that, booting takes under two minutes.
Whonix VM — persistent with strong isolation
Whonix runs as two virtual machines: a Gateway that routes all traffic through Tor, and a Workstation where you browse. The Workstation cannot reach the internet without going through the Gateway first. If the Workstation is compromised, the attacker cannot learn your real IP because the Workstation simply does not have routing access to the network layer.
Whonix is the best choice for a persistent setup where you need to save files across sessions. It runs on top of Qubes OS for the strongest combination, or as standalone VMs using VirtualBox on any host operating system.
Standard OS + Tor Browser — baseline
If neither Tails nor Whonix is practical for your situation, Tor Browser on your normal operating system provides the baseline protection. The Safest security setting disables JavaScript globally, which removes the largest attack surface. The risk with this approach is that your host machine and its history exist alongside your Tor session, creating potential for correlation through timing attacks, malware, or metadata leakage.
If you go this route: use a dedicated browser profile, never switch between Tor Browser and a regular browser in the same session, and close Tor Browser completely before opening any clearnet-linked application.
Download from torproject.org only
Go to torproject.org and download the installer for your operating system. There is exactly one legitimate source. Every "Tor Browser mirror" you find through a search engine has distributed malware at some point in the last ten years. Direct download, direct installation.
On Linux, verify the GPG signature of the tarball before extracting:
# Verify signature (Linux/macOS)
gpg --verify tor-browser-linux64-13.x_en-US.tar.xz.asc \
    tor-browser-linux64-13.x_en-US.tar.xz

# Expected: "Good signature from The Tor Project, Inc."
# If you get a warning about untrusted key, import Tor Project's signing key first:
gpg --keyserver keys.openpgp.org --recv-keys 0x4E2C6E8793298290
Windows and macOS installers verify themselves on launch — you do not need to run a separate check.
Set security level to Safest before your first connection
After installation, do not connect yet. Open the Security Settings first. Click the Shield icon in the toolbar → Advanced Security Settings → set the slider to Safest. This disables JavaScript globally. Drughub renders completely without JavaScript — this is a feature of the market's design, not a limitation. Safest also disables certain fonts and media that could be used for fingerprinting.
Now connect to Tor. The initial circuit build takes fifteen to thirty seconds. Once connected, the Tor circuit display shows three nodes — the guard relay, middle relay, and exit relay. You do not control which relays are used, and you do not need to.

Keep Tor Browser updated
Tor Browser prompts you when an update is available. Apply it before connecting to any .onion site. Security patches in Tor Browser releases are not optional maintenance — they frequently close vulnerabilities that actively affect darknet users. An outdated Tor Browser on the Safest setting is still safer than a current one on Standard, but current + Safest is the correct baseline.
Install GnuPG and KeePassXC
GnuPG is the tool for generating and managing PGP keys. Install it via your package manager on Linux, via Homebrew on macOS, or via the Gpg4win installer on Windows. KeePassXC is the password and secret manager you will use to store the private key passphrase. Both are free, open source, and widely audited.
Generate a dedicated 4096-bit RSA key
Open a terminal. This key pair is for drughub only — do not reuse an existing key from another identity.
# Generate a 4096-bit RSA key pair
gpg --full-generate-key

# At each prompt:
# Key type: (1) RSA and RSA
# Key size: 4096
# Expiration: 0 (does not expire)
# Real name: any pseudonym — use one you will not reuse elsewhere
# Email: leave blank, or use a Proton alias not linked to your real email
# Passphrase: 25+ characters, generated randomly, stored in KeePassXC
After generation, export the public key block. You will paste this into Drughub during registration:
# Export your public key (this is safe to share)
gpg --armor --export your-username@pseudonym > drughub-pubkey.ascTest the key before using it on drughub
Before registration, run a self-test. Encrypt a message with your public key and decrypt it with the private key. If this works, your key pair is functional and the passphrase is stored correctly in KeePassXC.
# Encrypt a test message to yourself
echo "test message" | gpg --encrypt --armor --recipient your-key-id > test.asc

# Decrypt it
gpg --decrypt test.asc
# Enter passphrase from KeePassXC
# Expected output: "test message"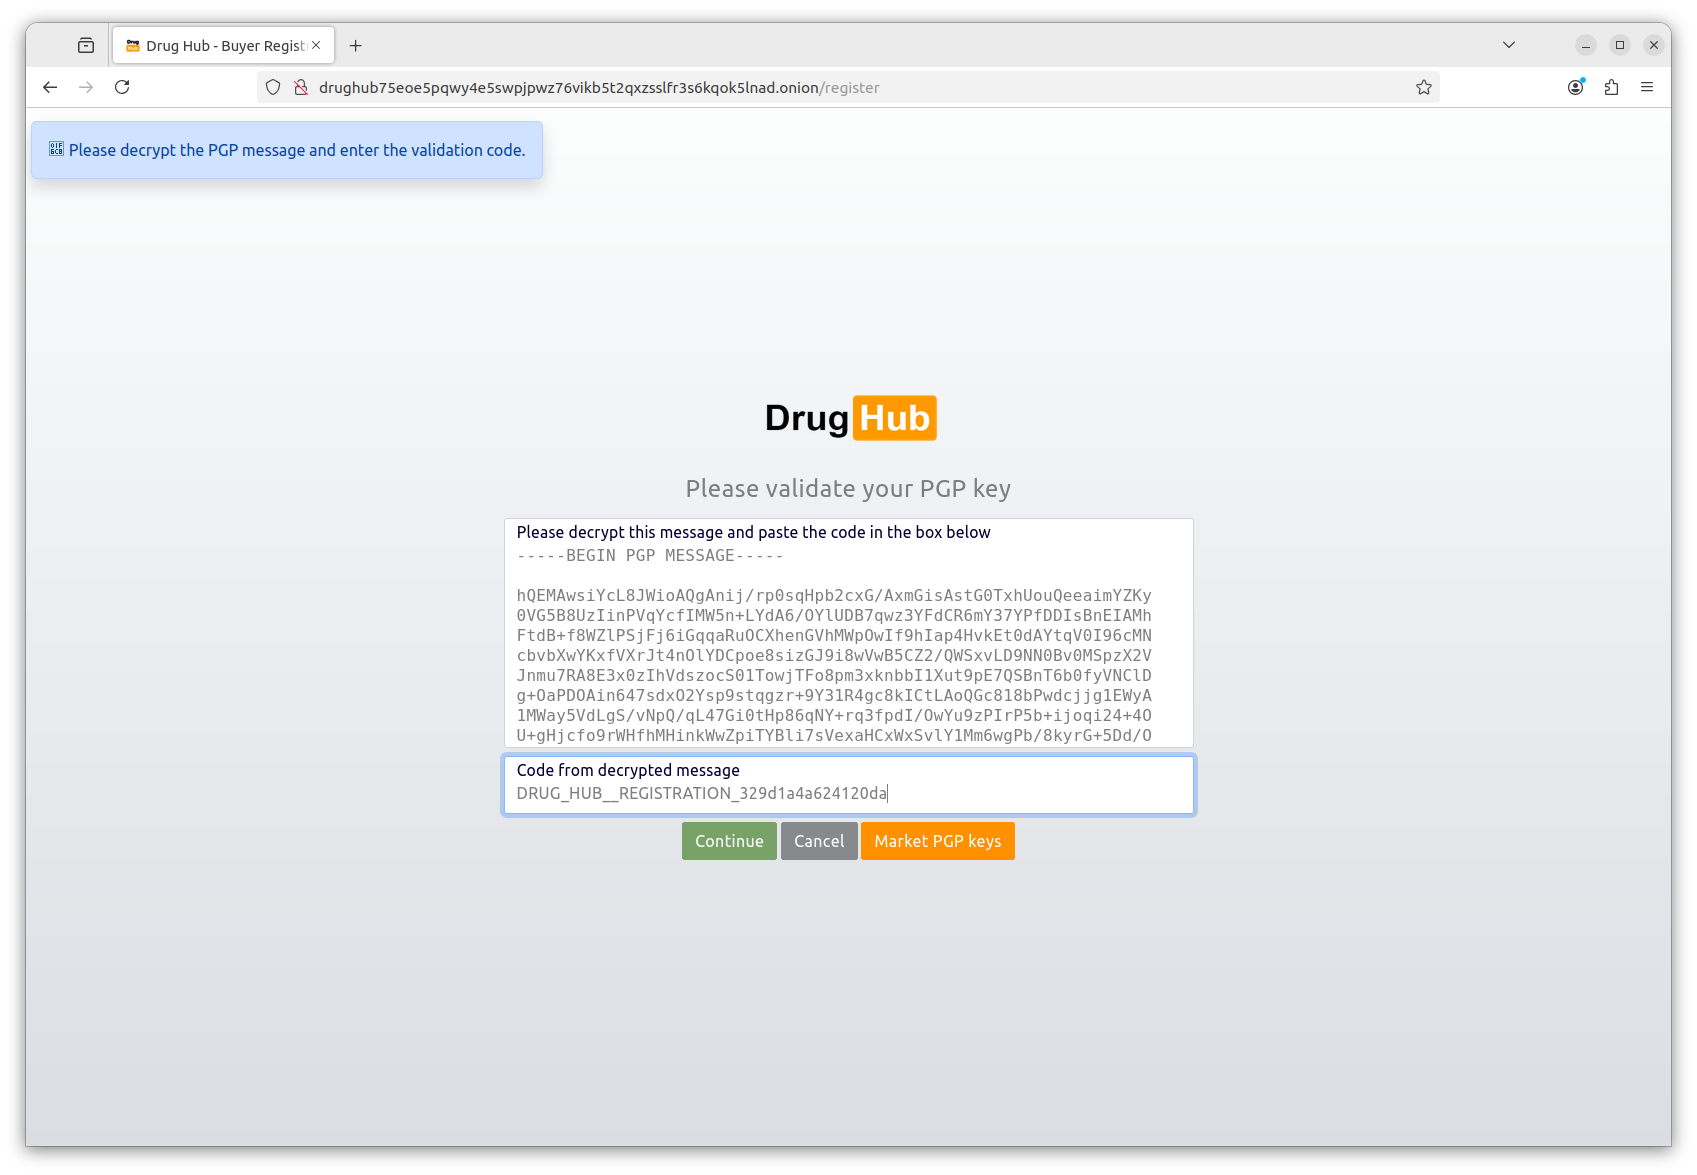
Why Monero, not Bitcoin?
Bitcoin sits on a public ledger. Every transaction — sender address, receiver address, and amount — is permanently visible to anyone who looks. Blockchain analysis companies run the lookups commercially. Monero hides all three by default: ring signatures obscure the sender, stealth addresses make the receiver unlinkable, and RingCT hides the amount. There is no practical way to trace a Monero transaction using only the blockchain.
The risk is at the edges — buying Monero from an exchange that verified your identity and then immediately withdrawing to drughub creates a short chain. Let the XMR sit in your self-custody wallet for some time and optionally swap it through another wallet before use. Each additional hop increases the analytical cost for anyone trying to trace the flow.
Install Feather Wallet or Cake Wallet
Two reliable options for self-custody Monero:
- Feather Wallet — desktop (Linux, macOS, Windows). Open source, actively maintained, connects through Tor by default. Best for desktop use with full node synchronization.
- Cake Wallet — mobile (iOS, Android). Good for smaller amounts and convenience. Also open source.
Download from the official project sites only. Create a new wallet inside the app. When prompted for a seed phrase, you will receive twenty-five words. Write these on paper. This is your wallet backup — it allows full recovery from any device. Store the paper somewhere physically secure. Do not photograph it, type it into any device, or store it in any cloud service.
Buy Monero and withdraw to your self-custody wallet
Acquire Monero from Kraken (supports Monero in most jurisdictions as of April 2026), a peer-to-peer exchange, or a non-KYC venue like LocalMonero. After purchase, withdraw to the receive address from your Feather or Cake Wallet — do not use the exchange address as a payment source for drughub.
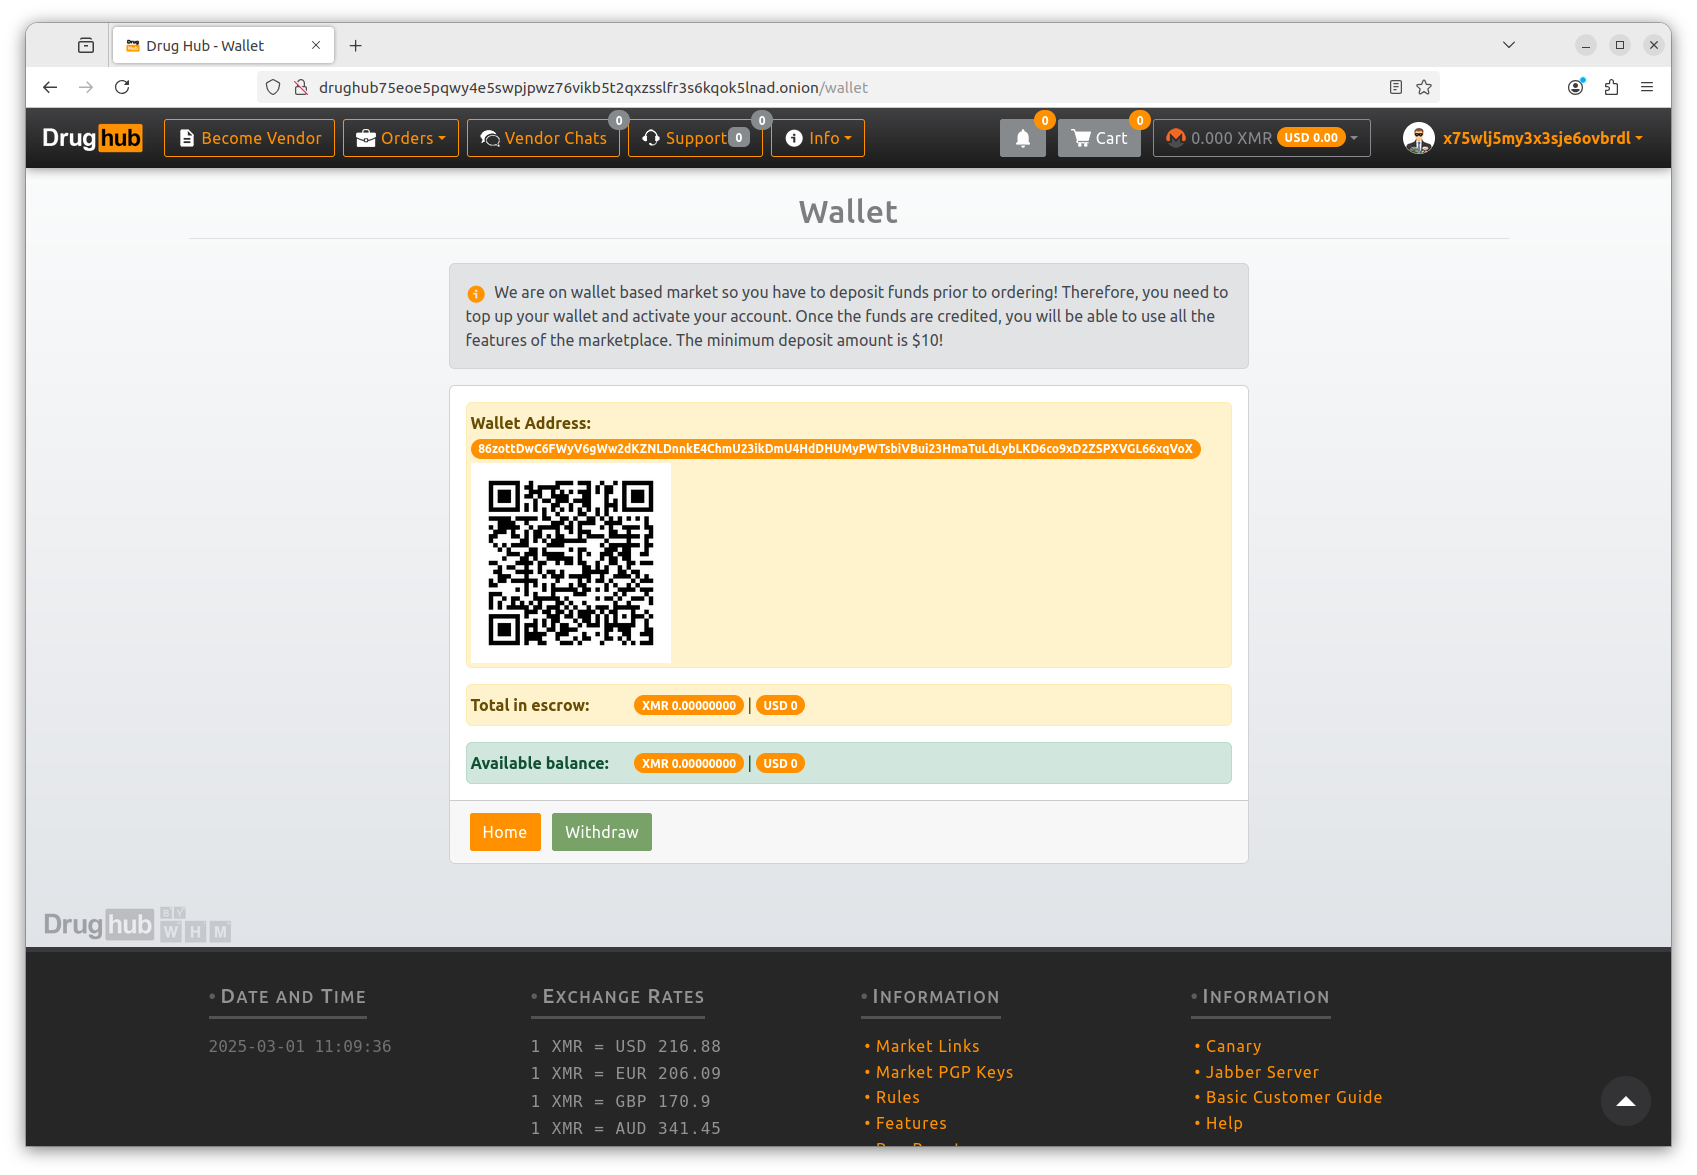
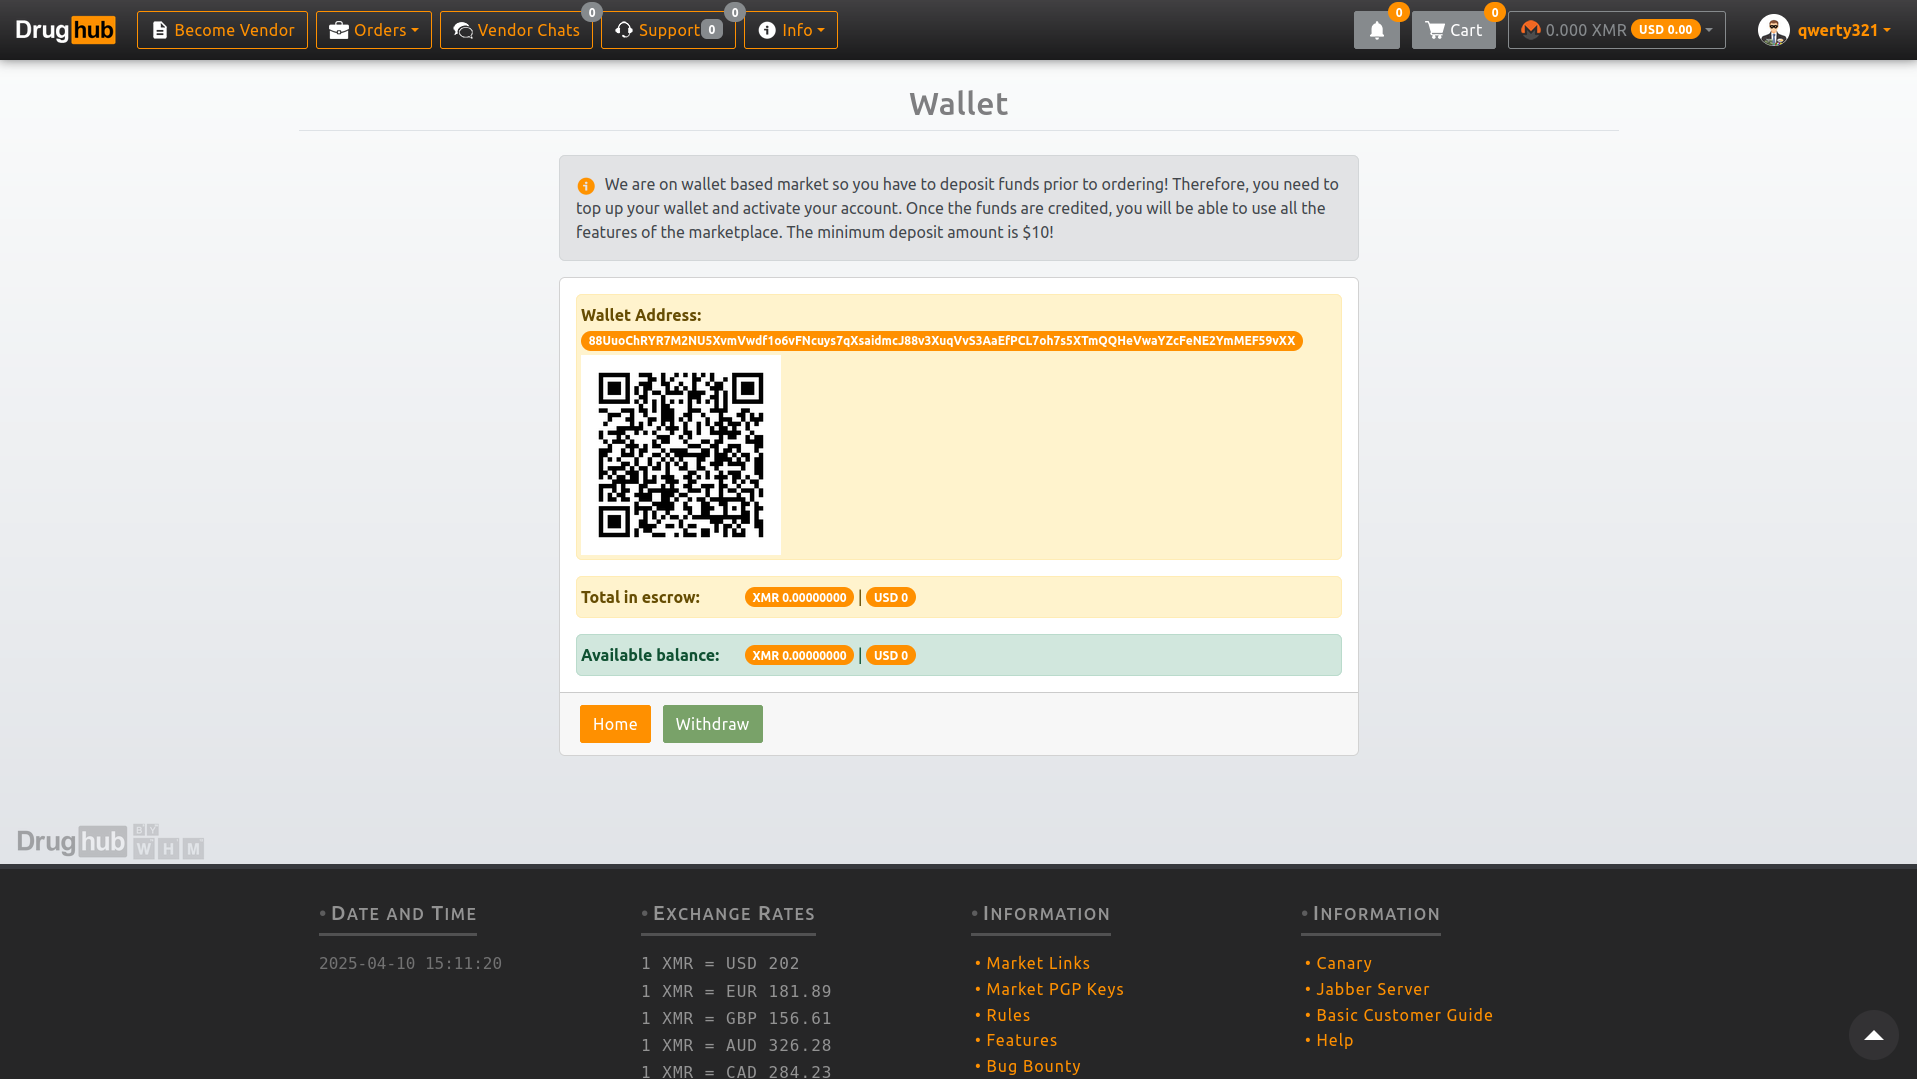
Wait for the transaction to confirm on the Monero blockchain before attempting to place an order. Monero transactions have one confirmation requirement and confirmation takes roughly two minutes. Drughub generates a unique Monero invoice per order — you pay from your self-custody wallet directly to that invoice address. The payment routes into a 2-of-3 multisig escrow immediately.
Copy from the verified urls page — never type by hand
The drughub verified urls page contains the current PGP-confirmed onion address. Click the "Copy verified drughub link" button. Do not transcribe the address by hand — a drughub onion address is fifty-six characters long and a single error silently routes you to a phishing server. The copy function is there specifically to prevent that mistake.
Alternatively: find the most recent mirror announcement on the Drughub Dread subforum, verify the PGP signature using GnuPG and the team's public key, and extract the address from the verified message. Both paths reach the same address — this directory simply automates the Dread monitoring step for you.
Verify first and last six characters after pasting
Open Tor Browser. Paste the drughub market link into the URL bar. Before pressing enter, visually compare the first six and last six characters of the pasted address against the one displayed on the urls page. Phishing operators build vanity addresses that match the beginning of the real address. The last six characters are a cryptographic checksum — they are the thing you are really checking. Both ends must match.
Check the PGP fingerprint in the footer
Once the Drughub front page loads, scroll to the bottom of the page. The footer includes a short PGP fingerprint that matches the Drughub team's long-lived signing key. Compare this fingerprint against the one included in the most recent Dread announcement. If the fingerprints match, the server you are on holds the private key associated with the team's public key — which only the real Drughub team has access to.
A phishing server cannot replicate this fingerprint correctly. It would require compromising the Drughub team's actual signing key. If the footer fingerprint is absent, visually different, or illegible in any way, close the tab and use the other address listed on the verified urls page.
Navigate to the registration page
On the Drughub front page, click Register. You will see a short form. Enter the username you generated for this persona — the one that is not linked to your identity anywhere else. The username is permanent. It cannot be changed after registration.
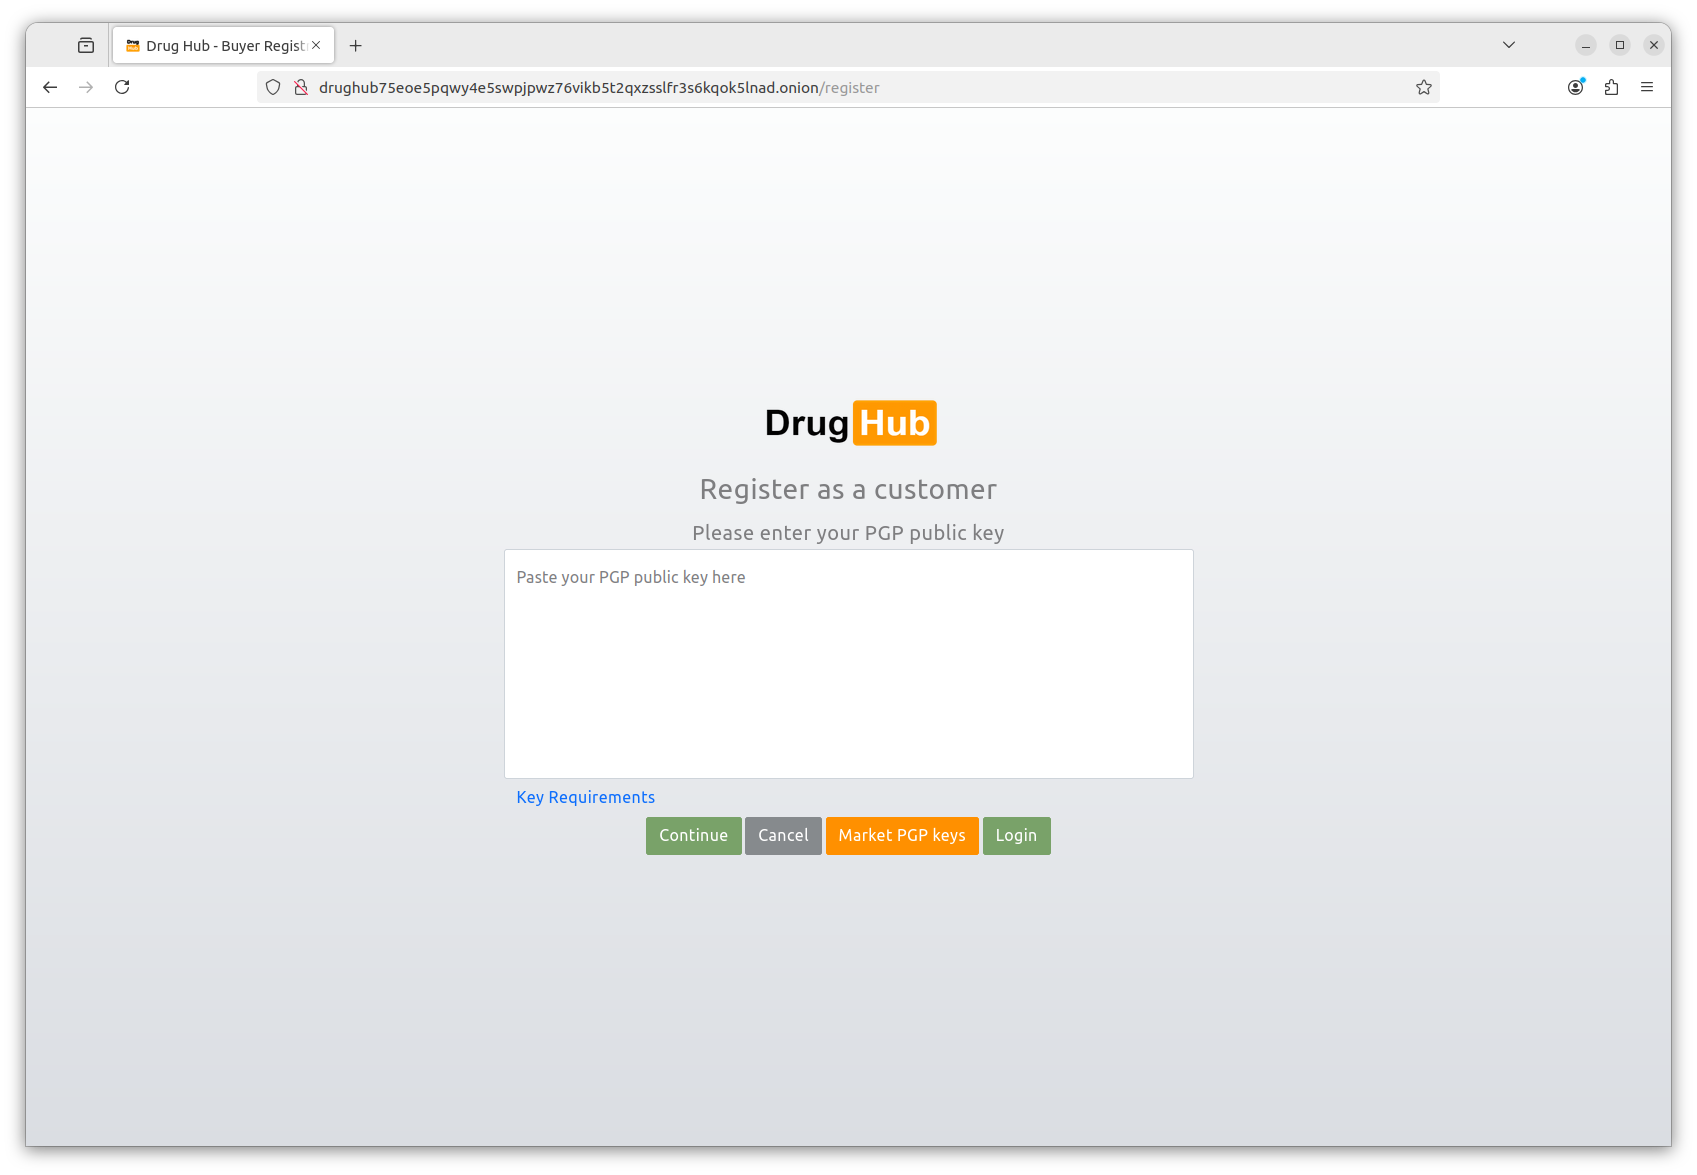
Paste your PGP public key block
Open the drughub-pubkey.asc file you exported in step 3.2. Copy the entire contents — everything from -----BEGIN PGP PUBLIC KEY BLOCK----- through the final -----END PGP PUBLIC KEY BLOCK----- line. Paste this into the PGP key field in the registration form.
The platform validates that the key is a valid 4096-bit RSA public key. If validation fails, check that you did not accidentally copy a private key block instead. The public key header reads BEGIN PGP PUBLIC KEY BLOCK. The private key header reads BEGIN PGP PRIVATE KEY BLOCK. If you see the latter, stop — do not paste your private key anywhere.
Solve the captcha and test your login immediately
Drughub uses a light visual captcha — designed to work on Tor Browser with JavaScript disabled. Complete it and submit the registration form. On success, you will see a confirmation and a prompt to log in.
Log out immediately. Then log in again. The login process will present you with an encrypted challenge — a block of ciphertext encrypted to your public key. Decrypt it using your private key in GnuPG, copy the decrypted text, and paste it back into the challenge field. This is passwordless PGP login in action.
# Decrypt the login challenge from drughub
# Copy the full ciphertext block, save it as challenge.asc, then:
gpg --decrypt challenge.asc
# Enter your key passphrase from KeePassXC
# Copy the decrypted output and paste it back into drughub's login form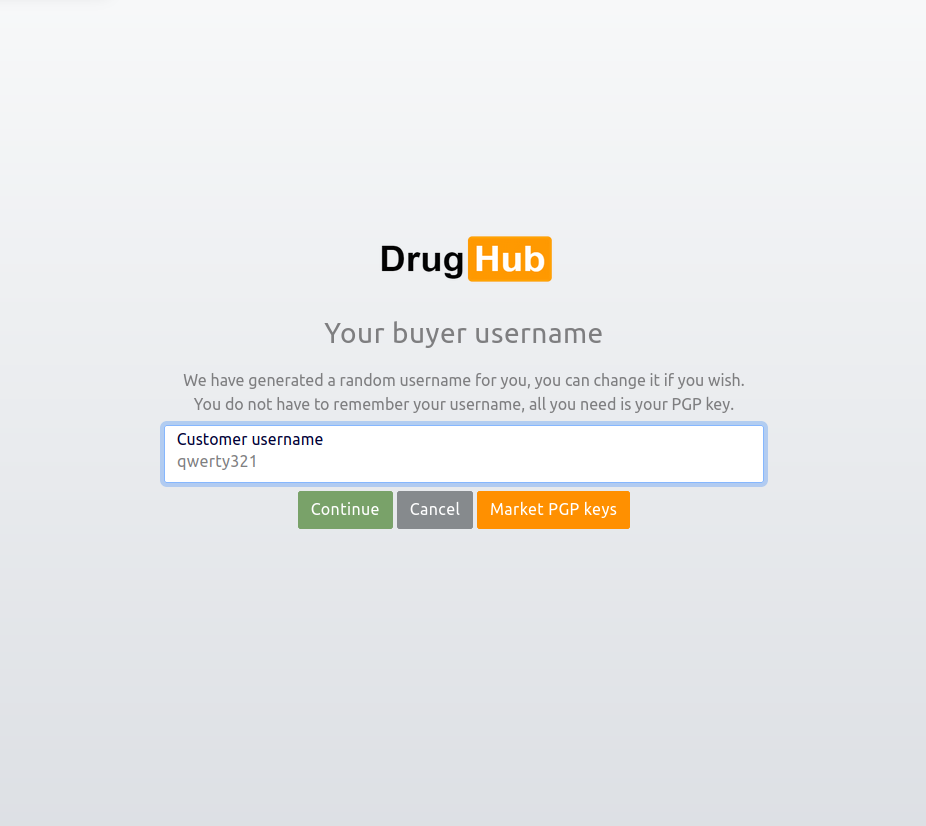
Choose a vendor with a Gold or Silver lab badge
Filter listings by Lab Verification badge. Gold means the full test battery passed — purity, contaminants, and weight accuracy all independently confirmed. Silver means standard verification passed. Bronze means basic purity only. For a first order, pick Gold or Silver exclusively. The badge is displayed on the product listing and on the vendor profile. The underlying lab report is linked as a public PDF from the product page — open it and read the numbers before you buy.
Check vendor feedback separately from the badge. A Gold badge vendor with four-hundred fifty-two completed orders and a 4.8 average is more informative than one with a badge and nine orders. Drughub weights feedback by order count and recency — the rating you see reflects recent performance, not just lifetime average.
Pay the Monero invoice from your self-custody wallet
Add the item to cart. Proceed to checkout. Drughub generates a unique Monero invoice for this specific order — a payment address and an exact XMR amount including a small randomization to prevent amount-based blockchain analysis. Copy the invoice address and the exact amount. Open Feather Wallet or Cake Wallet. Send that exact amount to that address. Do not round the amount — the invoice expects an exact figure.
Wait for ten Monero confirmations before the order status advances. At typical Monero block times, ten confirmations takes roughly twenty minutes. During this window, do not close Tor Browser. The order status page shows confirmation count in real time.
Release escrow only when the order is confirmed correct
When the order arrives and you are satisfied with it, return to the order page in Drughub and release escrow. This is the action that triggers the vendor's payout and finalises the transaction. It also adds a data point to both the vendor's rating and yours as a buyer. Do this for every order — vendors who hold their ratings on completed escrow releases are the most reliable ones.
Do not auto-release by leaving the order alone past the escrow deadline. Drughub auto-releases after the configured period if you take no action — but if something is wrong with the order, that window is your protection. Check every order before it reaches the auto-release deadline.
Do not release escrow if something is wrong
This is the most important rule in the dispute process. Releasing escrow is final. Once you release, the transaction is complete and the dispute window closes. If you receive nothing, something incorrect, or something that does not match the lab-verified quality level, do not release. Stay in escrow and open a dispute from the order page.
Submit evidence inside the dispute thread
The dispute thread is encrypted — only you, the vendor, and Drughub moderators can see it. Submit whatever evidence is relevant: photos of what arrived, the vendor's original lab report compared to your independent test results if you ran one, tracking information showing non-delivery. Write clearly and factually — the moderators read both sides before deciding.
Remove EXIF metadata from any photos before uploading. Images taken on phones contain GPS coordinates, device model, and timestamp data. Strip this with ExifTool or a dedicated metadata cleaner before attaching the file to the dispute thread.
Moderator resolution and multisig settlement
Drughub moderators typically respond within seventy-two hours. They review the evidence from both sides and use their multisig key to settle the escrow. Because the escrow is a 2-of-3 multisig — you, the vendor, Drughub — a moderator decision combined with either the buyer or vendor key is sufficient to release funds in either direction. The resolution is final and on-chain.
Drughub's dispute record is one of the better ones in this market segment, partly because the walletless escrow means moderators are deciding only the current transaction — not managing a platform balance that could influence incentives. Read the marketplace's public dispute statistics on their Dread page if you want historical data before placing a first order.
operational habits
Eight habits that protect most people
These are not advanced OPSEC. They are the eight things that account for the vast majority of avoidable mistakes in darknet operational security, based on reported incident patterns from 2021 to 2026.
One identity per purpose
A username or email used anywhere on the clearnet — Reddit, forums, any social platform — should not appear on Drughub. Unique usernames, unique personas, unique keys for each separate context. Cross-contamination is the single most common OPSEC failure.
Never pay from an exchange wallet
Exchanges that verified your identity tied that identity to your wallet address. Withdrawing from a KYC exchange directly to a Drughub invoice connects the transaction to your real person. Always withdraw to a self-custody wallet first. Add time between the exchange withdrawal and the marketplace payment.
PGP-encrypt every vendor message
Drughub requires PGP for login but does not always enforce it for individual messages. Encrypt anyway. Any unencrypted message stored server-side is a liability regardless of the platform's stated policies on message retention. GnuPG makes this a thirty-second step per message.
Separate the drughub device from daily use
Ideally, the machine or USB stick used to visit Drughub never runs clearnet-linked software. At minimum: close all other browser sessions, disable any syncing services, and do not switch between Tor Browser and a regular browser in the same session.
Keep Tor Browser at default window size
Maximizing or resizing Tor Browser creates a screen resolution fingerprint that uniquely identifies you among Tor users. All Tor Browser users at default window size look identical. The moment you resize, you stand out.
Store the private key on cold hardware
Your Drughub account is a PGP key pair. The private key lives on a dedicated USB or air-gapped device. Its passphrase lives in KeePassXC on a separate device. Neither the key nor the passphrase should be on the same device simultaneously during normal use.
Bookmark verified links, never search
Clearnet search results for "drughub link" are predominantly phishing pages. Bookmark the verified urls page and return here for any link updates. Do not run a search when you need a fresh address — phishing operators optimize specifically for that query.
Strip EXIF before uploading evidence
If you ever upload a photo to a Drughub dispute — for purity verification, delivery evidence, or any other purpose — strip the EXIF metadata first. Photos from modern phones contain GPS coordinates, device model, and timestamps embedded in the file. ExifTool removes all of this in one command.
environment selection
Operating environment compared
The three environments from Phase 1, compared on the factors that matter most for this use case.
| Factor | Tails OS | Whonix VM | Standard OS + Tor |
|---|---|---|---|
| Setup time | ~45 min (once) | ~60 min (once) | ~10 min |
| Session isolation | Complete (RAM only) | Strong (VM boundary) | Low (shared OS) |
| Data persistence | Encrypted volume (optional) | Persistent by default | Full persistence |
| Malware isolation | Resets on reboot | Isolated in VM | Shares host OS |
| Suitable for PGP key storage | Encrypted persistent volume | Yes, natively | Yes, with care |
| Recommended for | Most users | Power users | Low-risk baseline |
Monero wallet options compared
| Wallet | Platform | Tor support | Self-custody | Best for |
|---|---|---|---|---|
| Feather Wallet | Desktop (Linux, macOS, Windows) | Built-in, default | Yes | Desktop primary wallet |
| Cake Wallet | iOS, Android | Via Orbot | Yes | Mobile convenience |
| Monero GUI (official) | Desktop (all platforms) | Configurable | Yes | Running a full node |
| Exchange wallet | Web / app | No | No — custodial | Not suitable for Drughub |
resolution reference
Drughub dispute flow — what to do and what not to do
A clear reference for when an order does not go as expected. Drughub's dispute process is moderately well-regarded — the walletless escrow removes a key conflict of interest that makes many marketplaces poor arbiters of their own disputes.
Do before opening a dispute
- Wait the full estimated delivery window — most packages are delayed by postal delays, not vendor error
- Check that tracking, if provided, shows the correct delivery address
- Confirm the item has not been delivered to a neighbor, parcel locker, or alternate entry point
- Photograph any evidence while it is still fresh — packaging, contents, discrepancies
- Strip EXIF metadata from all photos before attaching to the dispute thread
- Note the exact order details — date, amount paid, item description, advertised lab tier
- Contact the vendor through Drughub's encrypted messaging first — some issues resolve before escalation
Do not do during a dispute
- Do not release escrow — that action is final and ends the dispute window immediately
- Do not communicate about the dispute outside the Drughub thread — use only the encrypted marketplace messaging system
- Do not upload unstripped photos containing device or location metadata
- Do not include your real name, address, or any identifying information in dispute messages
- Do not accept a vendor's partial refund offer outside the platform escrow — off-platform payments are unenforceable
- Do not wait past the escrow auto-release deadline without taking action
- Do not open the same dispute on Dread publicly while it is still active in the platform thread — moderators respond slower when matters are escalated externally while still in-platform
"The dispute system exists specifically because the walletless model means moderators decide only the current transaction — not a platform balance they have an incentive to protect. That structural difference is why the process is more trustworthy than most."
— From the Drughub marketplace documentation on Dread, March 2026
common questions
Questions about this getting started guide
Eight questions about setup, security, and Drughub access. Direct answers.
Ready? Start with the verified link.
The drughub market link on the verified urls page was last confirmed within the past 48 hours. Copy it, paste it into Tor Browser on the Safest setting, check the footer fingerprint. That is the complete entry sequence.
- Tor Browser from torproject.org · Security Level → Safest
- Monero wallet in self-custody before ordering
- Check footer PGP fingerprint when the page loads